
Welcome! This booklet guides you through creating delicious frozen desserts․ Explore recipes and instructions for your Cuisinart ice cream, yogurt, and sorbet maker․
Understanding Your Model
Your Cuisinart ice cream maker is designed for effortless homemade frozen treats․ Models like the ICE-20R and ICE-25 series offer automatic operation for ice cream, frozen yogurt, and sorbets․ Before beginning, familiarize yourself with your specific model’s features, referencing the instruction and recipe booklet available on the Cuisinart website (www․cuisinart․com);
Ensure the mixing paddle and lid are securely in place․ Understanding the components and their functions, as detailed in the manual, will ensure optimal performance and delicious results․ Different models may have slight variations, so always consult your specific manual for detailed guidance․
Key Components & Their Functions
Essential components include the motor base, freezer bowl, mixing paddle, and lid․ The freezer bowl must be thoroughly frozen before use – a critical step! The mixing paddle consistently churns the mixture, incorporating air for a smooth texture․ The lid securely covers the bowl during operation․
The motor base powers the churning process․ Refer to your model’s manual (available via ManualsLib for ICE-20R and others) for proper assembly․ Correct component placement, ensuring the paddle and lid are locked, is vital for safe and effective ice cream making․
Preparing for Ice Cream Making
Get ready! Thoroughly freeze the bowl for at least 24 hours․ Ensure your freezer is cold enough, and assemble the maker before starting․
Freezing the Bowl – A Critical Step
Essential for success! The freezer bowl must be completely frozen before use – this is non-negotiable for proper ice cream creation․ Aim for at least 24 hours of freezing time, and ideally longer․ A fully frozen bowl is crucial as it’s responsible for solidifying the mixture․
Before each use, double-check that the bowl is solid and feels extremely cold to the touch․ If there’s any doubt, return it to the freezer for additional hours․ Insufficient freezing will result in a soupy, rather than creamy, final product․ Proper preparation guarantees delightful results!
Checking Freezer Temperature
Optimal freezing is key! Ensure your freezer operates at 0°F (-18°C) or lower․ This temperature is vital for thoroughly freezing the ice cream maker’s bowl․ Use a freezer thermometer to verify the temperature, as many freezers aren’t accurately calibrated․
Avoid frequently opening the freezer door, as this raises the temperature and hinders the freezing process․ A consistent, cold environment is essential․ If your freezer isn’t cold enough, the bowl won’t freeze properly, leading to a soft or liquid ice cream․ Consistent temperature monitoring is crucial for success!
Assembling the Ice Cream Maker
Proper assembly is essential! First, ensure the frozen bowl is completely frozen – this is critical․ Place the bowl securely into the ice cream maker base․ Next, attach the dasher assembly, making sure the mixing paddle is correctly positioned within the bowl․
Confirm the dasher is firmly locked into place; it must be stable for effective churning․ Finally, attach the lid, ensuring it clicks securely onto the base․ The mixing paddle and lid must be in place before operation․ Double-check all connections before adding your ice cream mixture!

Making Your First Batch
Let’s begin! Select a recipe, prepare the mixture, and pour it into the frozen bowl․ The Cuisinart maker will then churn for 15-20 minutes․
Recipe Selection & Preparation
Choosing Your Flavor: Begin by selecting a recipe – classic vanilla, rich chocolate, or a refreshing frozen yogurt․ The included booklet, or Cuisinart’s website, offers numerous options․ Carefully review the ingredients list and ensure you have everything on hand․
Mixing the Base: Thoroughly combine the ingredients according to the recipe instructions․ This typically involves whisking together cream, milk, sugar, and flavorings․ Proper mixing is crucial for a smooth, consistent texture․ Some recipes may require chilling the mixture before churning; this step enhances freezing and prevents ice crystals․
Nutritional Considerations: Be mindful of calorie counts, as indicated in recipe details (e․g․, 222 calories for certain flavors), and adjust portion sizes accordingly․
Pouring the Mixture into the Frozen Bowl
Careful Transfer: Once the freezer bowl is thoroughly frozen – a critical step – carefully remove it from the freezer․ Gently pour the chilled ice cream mixture into the frozen bowl, ensuring not to overfill․ Leave at least one inch of headspace at the top, as the mixture will expand during the churning process․
Lid & Paddle Placement: Securely attach the lid to the bowl․ Then, insert the mixing paddle into the designated opening․ Confirm the paddle is firmly in place before proceeding; it’s essential for proper churning․ Refer to your model’s instructions for correct assembly․
The Churning Process – Timing & Observation
Initiate Churning: Plug in your Cuisinart ice cream maker and turn it on․ The mixture will begin to churn, scraping the frozen bowl’s sides․ Initial churning typically takes around 15 to 20 minutes, but this can vary․
Observe Consistency: Pay close attention to the mixture’s consistency․ It will gradually thicken, resembling soft-serve ice cream․ Avoid interrupting the process prematurely․ If a firmer texture is desired, continue churning for a few extra minutes, carefully monitoring to prevent motor strain․
Achieving the Perfect Consistency
Texture Control: Transfer to an airtight container for firmer results․ Churning time impacts texture – shorter for soft serve, longer for a classic, firm ice cream․
Soft Serve vs․ Firm Ice Cream
Understanding Texture: The consistency of your homemade treat directly relates to churning duration․ Immediately after the 15-20 minute churning cycle, your Cuisinart ice cream maker will produce a soft, creamy texture resembling soft serve․
For a Firmer Treat: If you prefer a firmer, more traditional ice cream consistency, transferring the mixture to an airtight container is crucial․ Allow it to harden in the freezer for a minimum of two hours․ This “maturation” process allows the flavors to meld and the texture to firm up beautifully; Adjust churning time for desired results!
Transferring to an Airtight Container
Preserving Freshness: Once the churning process is complete, promptly transfer your freshly made ice cream to a dedicated airtight container․ This step is vital for preventing ice crystal formation and maintaining optimal flavor and texture․
Minimizing Air Exposure: Press a piece of plastic wrap directly onto the surface of the ice cream before sealing the container․ This minimizes air exposure, further inhibiting crystallization․ Properly stored, your homemade ice cream will remain delightfully creamy for several days, offering continued enjoyment!
Adjusting Churning Time
Consistency is Key: The ideal churning time typically ranges from 15 to 20 minutes, but this can vary based on your recipe, ambient temperature, and desired consistency․ Observe the mixture closely during the process․
Soft Serve vs․ Firm: For a soft-serve texture, stop churning when the mixture resembles a thick milkshake․ If you prefer firmer ice cream, continue churning for a few extra minutes․ Remember, the mixture will harden further in the freezer․ Experiment to find your perfect timing!
Recipes & Flavor Ideas
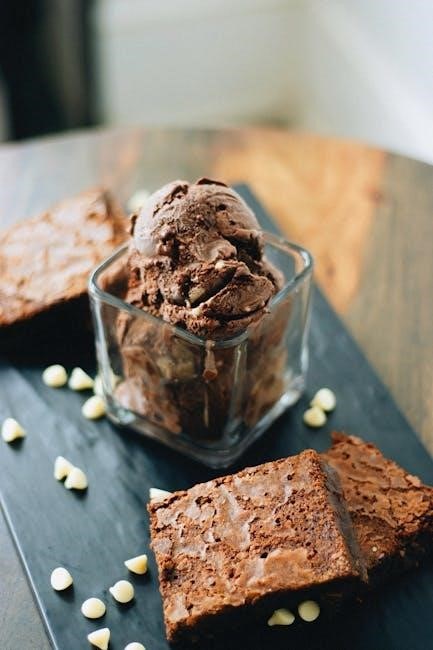
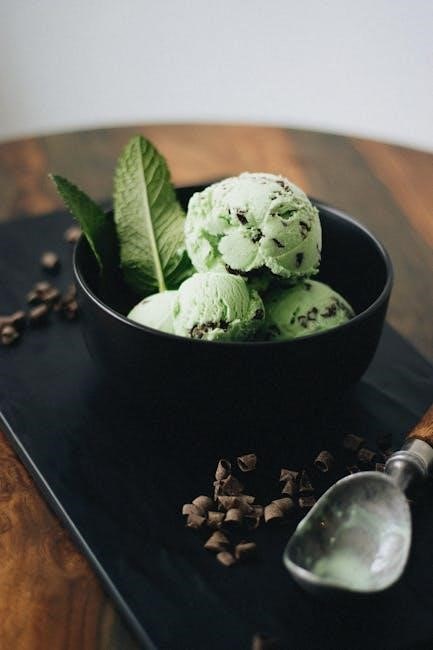
Get Creative! Explore classic vanilla, rich chocolate, or tangy frozen yogurt․ Add chocolate sauce or smore flavors for delightful homemade treats․
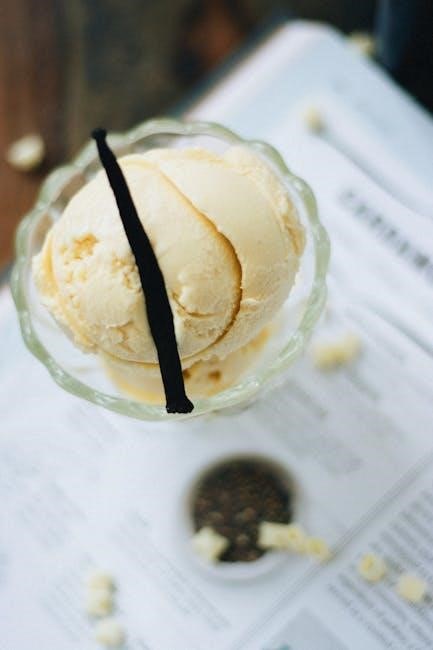
Classic Vanilla Ice Cream
A Timeless Favorite: Begin with 2 cups of heavy cream, 1 cup of milk, and ¾ cup of sugar․ Whisk together until the sugar dissolves completely․ Add 1 tablespoon of vanilla extract for that signature flavor․ Pour the mixture into your pre-frozen Cuisinart freezer bowl․
Turn on the ice cream maker and allow it to churn for approximately 20-25 minutes, or until the mixture thickens to a soft-serve consistency․ For a firmer texture, transfer to an airtight container and freeze for an additional 2-4 hours․ Enjoy this simple, yet satisfying, classic!
Chocolate Ice Cream Variations
Indulge Your Cravings: For a rich chocolate experience, add ½ cup of unsweetened cocoa powder to the classic vanilla base․ Alternatively, melt 4 ounces of dark chocolate and stir it into the cream mixture before churning․ Enhance the flavor with a teaspoon of instant espresso powder!
Consider adding chocolate chips or chunks during the last few minutes of churning for delightful texture․ A swirl of chocolate sauce (approximately 330 calories per serving!) after churning elevates the experience․ Remember to freeze for firmness․
Frozen Yogurt Recipes
Healthy & Delicious: Create tangy frozen yogurt by substituting milk with yogurt in your favorite ice cream recipe․ For a basic recipe, combine 2 cups of yogurt (Greek yogurt works well!), ¾ cup sugar, and 1 teaspoon vanilla extract․
Churn as you would ice cream, approximately 15-20 minutes․ Experiment with fruit purees – strawberry, raspberry, or mango – for added flavor․ A serving can be around 222 calories! Transfer to an airtight container for a firmer texture․ Enjoy a guilt-free treat!

Cleaning & Maintenance
Keep it fresh! Disassemble components after each use․ Wash all parts with warm, soapy water, then thoroughly dry․ Proper storage prevents issues․
Disassembling the Ice Cream Maker
Before cleaning, safely disassemble your Cuisinart ice cream maker․ First, unplug the unit! Gently remove the lid and the mixing paddle․ The freezer bowl is a separate component and should be lifted straight up and out․ Be careful not to scratch the bowl’s interior․ The paddle has multiple parts; detach these for thorough cleaning․ Refer to your model’s specific diagram in the instruction booklet for precise disassembly steps․ Ensure all parts are accounted for before proceeding to washing․ Proper disassembly ensures effective cleaning and prolongs the life of your appliance․
Washing the Components
Hand washing is recommended for most Cuisinart ice cream maker parts․ Use warm, soapy water to gently clean the lid, mixing paddle, and all its components․ The freezer bowl should also be washed with warm water and mild soap, but avoid abrasive cleaners․ The motor base can be wiped clean with a damp cloth – never immerse it in water! Ensure all soap residue is thoroughly rinsed away․ Dishwasher use may be suitable for some parts; consult your model’s manual․ Dry all components completely before reassembling and storing to prevent mold or damage․
Proper Storage Techniques
To maintain your Cuisinart ice cream maker’s longevity, store components correctly․ Ensure all parts are completely dry before storage to prevent mildew․ The freezer bowl requires special attention; it should be stored in the freezer to remain ready for use․ The lid and paddle can be stored in a cool, dry place․ Avoid stacking heavy items on top of the freezer bowl․ The motor base should be stored in a dry environment, away from direct sunlight and extreme temperatures․ Proper storage ensures optimal performance for future batches!
Troubleshooting Common Issues
If ice cream isn’t freezing, verify the bowl is fully frozen․ A stalled motor often indicates a frozen mixture; unplug and gently restart․ Crystallization means longer churning․
Ice Cream Not Freezing
A common issue is insufficient freezing of the bowl․ Ensure it’s been in the freezer for at least 24 hours, ideally longer, at a sufficiently cold temperature․ Double-check your freezer’s settings; it should be below 0°F (-18°C)․
Also, confirm the mixing paddle and lid are securely in place before operation, as the machine won’t start without them․ If the mixture isn’t chilling, the bowl may not be level․ Finally, a very warm mixture will take longer to freeze, so pre-chill it thoroughly before pouring it into the frozen bowl․
Motor Stalling During Churning
If the motor stalls, first unplug the unit immediately․ This often happens with overly thick mixtures or if the freezer bowl isn’t fully frozen․ Allow the mixture to soften slightly, then restart the machine․ Ensure the bowl is completely frozen for a minimum of 24 hours before use․
Avoid overfilling the bowl, as this strains the motor․ Also, check for any obstructions around the paddle․ If stalling persists, let the mixture thaw a bit more and try again, ensuring the machine isn’t overloaded․
Crystallization Problems
Ice crystals form when freezing is slow or inconsistent․ To minimize this, ensure your freezer bowl is thoroughly frozen – a full 24 hours is crucial․ Using a high-fat content recipe also helps, as fat interferes with crystal formation․
Churning for the recommended time is vital․ After churning, immediately transfer the ice cream to an airtight container and freeze for at least two hours to harden and further reduce crystallization․ Avoid repeatedly opening the container during this final hardening process․

Advanced Techniques
Elevate your creations! Experiment with sorbets, custom flavors, and adding mix-ins during the churning process for unique, delightful frozen treats․
Making Sorbets
Sorbets offer a refreshing, dairy-free alternative! Begin with a fruit puree – ensure it’s smooth for optimal texture․ Combine the puree with a simple syrup (sugar and water, boiled then cooled) and a touch of lemon juice to enhance flavors․
Pour the mixture into your pre-frozen bowl and churn as you would ice cream, typically for 20-30 minutes․ Sorbets generally require a slightly longer churning time than ice cream to achieve the desired consistency․
Remember, sorbet consistency is firmer than soft-serve ice cream, so adjust churning time accordingly․ Enjoy a vibrant, flavorful, and naturally sweet treat!
Creating Custom Flavors
Unleash your inner ice cream artist! Start with a standard base – vanilla is ideal – and experiment with additions․ Extracts (vanilla, almond, peppermint) provide concentrated flavor․ Purees (fruit, pumpkin) add natural sweetness and texture․
For bolder tastes, incorporate melted chocolate, coffee concentrate, or even spices like cinnamon or nutmeg․ Remember to add liquid flavorings before churning․ Solid mix-ins, like chocolate chips or nuts, are best added during the last few minutes of churning․
Don’t be afraid to get creative and personalize your frozen delights!
Adding Mix-Ins During Churning
Timing is key for perfect mix-in distribution! Wait until the last 5-10 minutes of the churning process․ This prevents larger pieces from sinking to the bottom or becoming overly crushed․
Slowly pour in your chosen additions – chocolate chips, chopped nuts, cookie pieces, fruit – through the chute in the lid while the machine is running․ Avoid adding too much at once, as this can strain the motor․
A little goes a long way! Experiment with quantities to achieve your desired texture and flavor balance․
Safety Precautions
Always unplug the appliance before cleaning․ Handle the frozen bowl with care to avoid damage․ Supervise operation, and ensure electrical safety at all times․
Electrical Safety
To ensure safe operation, always verify your outlet voltage matches the appliance’s specifications․ Never operate the Cuisinart ice cream maker with a damaged cord or plug; immediate replacement is crucial․ Avoid using extension cords if possible, but if necessary, ensure it’s appropriately rated for the appliance’s wattage․
Do not immerse the motor unit in water or any other liquid․ Keep the appliance away from heat sources․ Always unplug the unit when not in use and before cleaning․ Inspect the cord regularly for any signs of damage, and discontinue use if issues are detected․ Prioritize electrical safety for a worry-free experience!
Proper Handling of Frozen Bowl
The freezer bowl requires careful handling․ Ensure it’s completely frozen – typically at least 24 hours – before use․ Avoid any impact or dropping, as this can compromise its functionality․ Never attempt to thaw the bowl forcibly; allow it to thaw naturally at room temperature․
Do not use hot water to speed up thawing․ Always check for cracks or damage before each use․ Handle with care to prevent deformation․ Proper freezing and handling are vital for optimal ice cream making and bowl longevity․ Avoid thermal shock by letting it adjust to room temperature gradually․
Supervision During Operation
Always supervise the ice cream maker while it’s running․ Never leave it unattended, especially around children․ Ensure the mixing paddle is securely in place before starting the churning process․ Monitor the mixture’s consistency; it should thicken within 15-20 minutes․
Be aware of any unusual noises or motor strain, and stop the machine immediately if detected․ Do not attempt to disassemble the unit while it’s still operating․ Safe operation requires constant attention and adherence to these guidelines for a delightful experience․

Warranty Information
Register your Cuisinart product for warranty coverage! Contact customer support with questions․ Details regarding coverage and registration are available on the Cuisinart website․
Registering Your Product
Protect your investment! Registering your Cuisinart ice cream maker online at www․cuisinart․com is a simple process․ This crucial step activates your warranty and ensures access to important product updates and exclusive offers․ You’ll need your model number (ICE-20R or similar) and date of purchase․
Registration allows Cuisinart to contact you should any safety notifications arise․ It also streamlines the process if you ever need to utilize your warranty for service or support․ Don’t delay – register today for peace of mind!
Understanding Coverage
Your Cuisinart warranty typically covers defects in materials and workmanship for a limited period, often one year from the date of purchase․ This doesn’t cover damage from misuse, accidents, or unauthorized repairs․ Carefully review the full warranty details available online at the Cuisinart website (www․cuisinart․com) or within your product’s documentation․
The warranty ensures your ice cream maker functions as intended under normal household use․ Retain your proof of purchase, as it’s required for any warranty claims․ Understanding the terms protects your investment!
Contacting Customer Support
Need assistance? Cuisinart provides excellent customer support for all their products․ The primary resource is their official website, www․cuisinart․com, where you’ll find FAQs, downloadable manuals (like the ICE-20R and ICE-25 series), and troubleshooting guides․ For direct assistance, you can typically find a phone number and email address on their website’s “Contact Us” page․
Be prepared to provide your model number and purchase date when reaching out․ Prompt and helpful support ensures a smooth ice cream-making experience!