This tutorial will guide you through the process of making a beautiful and classic log cabin quilt. You’ll learn how to cut‚ assemble‚ and quilt the blocks‚ as well as how to create a stunning quilt top. Whether you’re a beginner or an experienced quilter‚ this step-by-step guide will help you create a timeless piece of art that you can cherish for years to come.
Introduction
The log cabin quilt block is a timeless and versatile design that has been enjoyed by quilters for centuries. Its origins can be traced back to ancient times‚ with depictions of the basic block construction found in artifacts from various cultures‚ including Egyptian‚ Roman‚ and Peruvian. The log cabin block is a favorite among quilters because of its simplicity‚ adaptability‚ and endless possibilities for creativity.
This tutorial will guide you through the process of creating a stunning log cabin quilt using a straight setting layout. We will cover everything from choosing fabrics and cutting instructions to assembling the blocks and quilting the finished quilt top. This tutorial is designed for both beginners and experienced quilters‚ providing clear and concise instructions to help you achieve a beautiful and satisfying quilting experience.
The Log Cabin Quilt Block
The log cabin quilt block is named after the traditional log cabins built by early settlers in America. The block’s construction mimics the way logs were stacked to build the walls of these cozy dwellings. The block is pieced from strips of fabric‚ which are sewn together in a spiral pattern‚ creating a visually appealing and intricate design.
The basic log cabin block consists of a central square‚ often referred to as the “hearth‚” surrounded by strips of fabric that represent the logs. These strips are sewn to the hearth in alternating light and dark colors‚ creating a visually striking contrast and a sense of depth. The traditional log cabin block often features a red center square‚ symbolizing the warmth and heart of the home.
The beauty of the log cabin block lies in its versatility. It can be adapted in countless ways‚ with variations in size‚ color‚ and pattern. You can use a variety of fabrics‚ from solids to prints‚ to create a unique and personalized quilt.
Materials
Before you begin piecing your log cabin quilt‚ gather the necessary materials. You’ll need a variety of fabrics‚ quilting supplies‚ and some basic tools. Here’s a comprehensive list to ensure you have everything you need for a successful quilting experience⁚
- Fabric⁚ Choose fabrics in colors and patterns that complement your design vision. You’ll need a combination of light and dark fabrics for the log cabin blocks‚ and additional fabric for the quilt backing and binding. You can use pre-cut strips like jelly rolls or charm packs for added convenience.
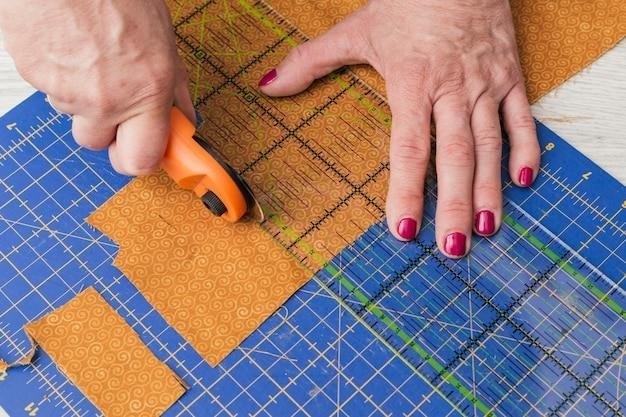
- Quilting Supplies⁚ Essential supplies include a sewing machine‚ thread‚ needles‚ pins‚ rotary cutter‚ cutting mat‚ ruler‚ and an iron. A walking foot for your sewing machine can be helpful for sewing multiple layers of fabric together smoothly.
- Quilt Backing⁚ Select a fabric that coordinates with your quilt top and is at least 108 inches wide. You’ll need approximately 3 yards of fabric for a queen-size quilt.
- Quilt Batting⁚ Choose a batting that provides the desired loft and warmth for your quilt. A king-size batting (120 x 120 inches) will be sufficient for a queen-size quilt.
- Binding Fabric⁚ Select a fabric that complements your quilt top and is at least 2 1/2 inches wide. You’ll need approximately 10 strips of fabric‚ each 2 1/2 inches wide and the width of the fabric (WOF)‚ for a queen-size quilt.
With these materials in hand‚ you’re ready to embark on your log cabin quilting journey!
Cutting Instructions
The accuracy of your cutting will contribute significantly to the overall appearance of your log cabin quilt. Precise cuts ensure that your blocks fit together perfectly and create a visually appealing finished product. Here’s a detailed guide to cutting your fabric strips for the log cabin blocks⁚
- Fabric Strips⁚ Begin by cutting your fabrics into 2 1/2-inch wide strips. The length of the strips is not crucial at this stage. If you’re using pre-cut jelly rolls‚ you’ll already have strips of the perfect width. If using yardage‚ use a rotary cutter and ruler to achieve accurate cuts.
- Number of Strips⁚ For a queen-size quilt‚ you’ll need approximately 49 log cabin blocks. Each block requires a specific number of strips. Refer to the quilt pattern you’ve chosen for the exact number of strips needed per block. Plan to have extra strips for any potential mistakes or variations in your blocks.
- Strip Length⁚ The length of your strips will determine the size of your finished log cabin blocks. For a queen-size quilt with 14-inch finished blocks‚ you’ll need strips that are at least 14 1/2 inches long. Remember to account for seam allowances when determining the initial strip length.
Take your time and ensure that your cuts are precise and consistent. This careful preparation will make the subsequent assembly process much smoother and more enjoyable.
Log Cabin Block Assembly
Now that your fabric strips are ready‚ it’s time to assemble the iconic log cabin blocks that will form the heart of your quilt. This process is surprisingly simple and rewarding‚ even for beginners. Here’s how to create your log cabin blocks⁚
- Start with the Center⁚ Begin by placing two 2.5-inch squares of fabric‚ right sides together. These squares will represent the “hearth” of your log cabin block. Stitch along one side‚ leaving a 1/4-inch seam allowance. Press the seam open to create a flat‚ crisp finish.
- Adding the Logs⁚ Take a strip of fabric and place it right sides together with one of the squares‚ aligning the raw edges. Stitch along the long edge‚ leaving a 1/4-inch seam allowance. Press the seam open. Repeat this process with another strip‚ attaching it to the other square‚ ensuring that the seams are pressed in opposite directions.
- Building the Block⁚ Continue adding fabric strips‚ alternating colors and pressing the seams in opposite directions. Each new strip should be placed right sides together with the previous strip‚ aligning the raw edges. Stitch and press each seam as you go. As you build the block‚ you’ll create a spiral effect‚ with the center squares at the heart of the block.
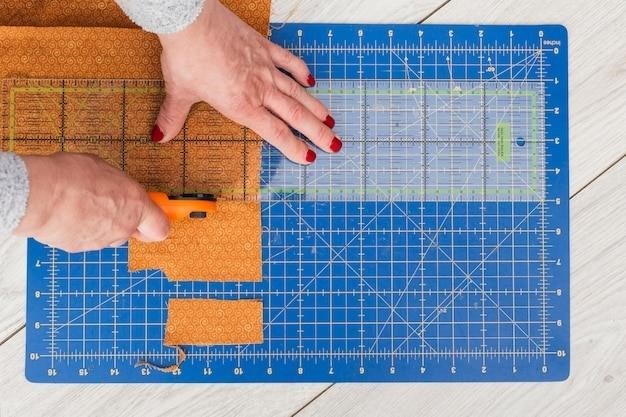
- Finishing the Block⁚ Once you’ve added all the strips needed for your log cabin block‚ trim the block to the desired size. Use a rotary cutter and ruler for precise trimming. Press the block flat to create a neat and finished appearance.
You’ll find that creating log cabin blocks is a very satisfying process. Each block represents a small piece of your quilt‚ and as you assemble them‚ you’ll see the overall design of your quilt begin to take shape.
Quilt Layout
Now that you have your log cabin blocks ready‚ it’s time to plan how they will come together to form the beautiful top of your quilt. There are many different layouts you can choose from‚ each with its own unique visual appeal. Here are a few ideas to inspire you⁚
- Straight Setting⁚ This is the most traditional log cabin quilt layout. It involves arranging the blocks in a simple grid pattern‚ alternating the orientation of the blocks to create a straight‚ linear design. The straight setting creates a classic look‚ and it’s a great option for beginners.
- Courthouse Steps⁚ This layout adds a bit of visual interest to the traditional straight setting. It involves arranging the blocks in a staircase pattern‚ with the blocks in each row offset from those in the row above. This creates a dynamic look that adds depth and movement to the quilt.
- Pinwheel⁚ This layout creates a more intricate and eye-catching design. It involves arranging the blocks in a circular pattern‚ with the blocks in each row offset from those in the row above. This creates a swirling‚ pinwheel effect that adds a touch of elegance to the quilt.
- Modern Variations⁚ There are endless possibilities for modern log cabin quilt layouts. You can experiment with different block sizes‚ colors‚ and arrangements to create a quilt that reflects your own personal style. For example‚ you can use a combination of traditional and modern log cabin blocks to create a unique and contemporary design.
Take some time to explore different layout options and choose the one that best suits your vision for your log cabin quilt. You can sketch out your layout on paper or use a quilt design software to visualize different possibilities. Once you’ve decided on a layout‚ you can start assembling your quilt top.
Sewing the Quilt Top
With your log cabin blocks arranged in your chosen layout‚ it’s time to start sewing them together to create the quilt top. This is the most satisfying part of the process‚ as you’ll see your quilt take shape. Here’s how to sew your log cabin blocks together⁚
- Sew Rows⁚ Start by sewing the blocks in each row together. Use a 1/4-inch seam allowance and be sure to press your seams open to prevent bulkiness in your quilt. When sewing multiple blocks together‚ use a walking foot on your sewing machine to help feed the fabric evenly. For a more professional look‚ use a basting spray to keep the blocks in place as you sew them together.
- Alternating Seam Directions⁚ As you sew each row‚ alternate the direction of the seams. This helps to create a more stable quilt top and prevents the quilt from puckering or shifting. For example‚ press the seams in the first row to the right‚ the seams in the second row to the left‚ the seams in the third row to the right‚ and so on.
- Sew Rows Together⁚ Once you’ve sewn all of the rows together‚ it’s time to sew the rows together to create the quilt top. Again‚ use a 1/4-inch seam allowance and press your seams open to prevent bulkiness. Be sure to align the blocks carefully and use a walking foot to ensure even feeding.
As you sew‚ take your time and make sure your seams are precise. This will ensure that your quilt top is smooth and even. If you make any mistakes‚ don’t worry! You can always unpick the seams and redo them. Once you’ve sewn all of the blocks together‚ your quilt top is complete! Now you’re ready to move on to the next step⁚ quilting.
Quilt Backing and Batting
Before you can quilt your log cabin quilt top‚ you need to prepare the backing and batting. The backing is the fabric that will be on the back of your quilt‚ and the batting is the fluffy layer that goes in between the quilt top and the backing. Together‚ these layers create the “quilt sandwich” that will be quilted.
For a queen-sized quilt‚ you’ll need about 3 yards of wide backing fabric (usually 108 inches by 108 inches). Choose a fabric that complements the colors and style of your quilt top. Cotton fabrics are a popular choice for backing‚ as they are durable and easy to work with. You can also use flannel for a softer feel.
For batting‚ a pre-packaged king-size batting (120 inches by 120 inches) is a good choice. You’ll need to trim it to about 102 inches by 102 inches to fit your quilt top. Batting comes in a variety of weights‚ from light to heavy. Choose a weight that is appropriate for the size and weight of your quilt. For a log cabin quilt‚ a medium-weight batting is a good choice.
Once you have your backing and batting‚ you’re ready to assemble your quilt sandwich.
Basting and Quilting
Basting is the process of temporarily securing the layers of your quilt sandwich together before quilting. This ensures that the layers stay in place while you quilt‚ preventing shifting and puckering. There are several methods for basting‚ including using safety pins‚ basting spray‚ or a basting machine. Choose the method that works best for you.
Once your quilt sandwich is basted‚ you’re ready to quilt. Quilting is the process of stitching through all three layers of the quilt sandwich‚ creating a decorative design and adding strength and stability to the quilt. There are many different quilting styles‚ from simple straight lines to intricate free-motion designs. Choose a style that complements the design of your log cabin quilt.
For a beginner-friendly quilting pattern‚ consider a straight line quilting pattern of diagonal lines. First‚ quilt lines going from left to right across the quilt‚ then go from right to left. Make the grid lines about 2 inches apart to create a crosshatch quilting pattern. If you’re feeling more adventurous‚ you can explore free-motion quilting‚ which involves using a free-motion quilting foot on your sewing machine to create flowing designs.
No matter what quilting style you choose‚ remember to take your time and enjoy the process. The quilting is the final stage of your log cabin quilt‚ and it’s a great opportunity to add a personal touch to your creation.
Binding
Binding is the finishing touch that completes your log cabin quilt. It encloses the raw edges of the quilt‚ giving it a polished look and preventing fraying. The binding is typically made from fabric strips that are sewn together to create a long continuous strip.
For your log cabin quilt‚ you’ll need to cut 10 strips of fabric‚ each measuring 2 1/2 inches wide by the width of your fabric (WOF). Join these strips end-to-end to create a single long binding strip. You can use a variety of fabrics for your binding‚ from coordinating solids to patterned prints. Choose a fabric that complements the colors and style of your quilt.
There are several methods for attaching the binding to your quilt‚ such as machine stitching or hand stitching. Machine stitching is a faster and more efficient method‚ while hand stitching provides a more traditional and personalized look. No matter which method you choose‚ be sure to sew the binding securely to the quilt‚ ensuring that the raw edges are completely enclosed.
Once the binding is attached‚ you can trim any excess fabric and press the binding flat. Your log cabin quilt is now complete and ready to be enjoyed!
Tips for Beginners
Creating a log cabin quilt can be an enjoyable and rewarding experience‚ even for beginners. Here are some tips to help you navigate the process with ease and confidence⁚
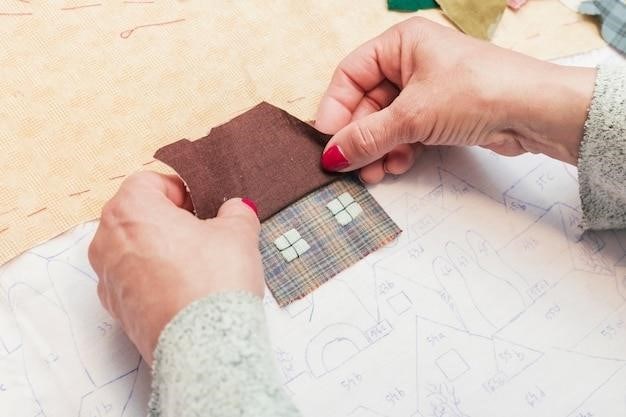
Start with simple blocks⁚ Begin with a smaller quilt or a few blocks to practice your piecing skills before tackling a large project. The log cabin block is a great choice for beginners because it’s easy to assemble and forgiving of small imperfections.
Use pre-cut strips⁚ Jelly rolls and pre-cut strips can save you time and make the cutting process less daunting. They come in a variety of colors and patterns‚ allowing you to create a unique and personalized quilt.
Press your seams⁚ Pressing your seams as you go helps to create a more polished and professional-looking quilt. It also helps to prevent your quilt from puckering and ensures that your blocks lay flat.
Don’t be afraid to ask for help⁚ If you encounter any challenges‚ don’t hesitate to ask for help from a more experienced quilter or a friend. There are also many online resources and quilting communities that can provide guidance and support.
Remember‚ quilting is a journey‚ not a race. Enjoy the process and celebrate each step of the way. With patience and practice‚ you’ll be amazed by the beautiful quilt you create.
