Cheer Bow Tutorial⁚ A Step-by-Step Guide
This easy-to-follow tutorial will guide you through the process of creating your own cheer bows, perfect for adding a touch of spirit to any outfit. Whether you’re cheering on your favorite team or just want to add a pop of color to your hair, these DIY cheer bows are a fun and affordable way to show your support.
Materials Needed
Gather these supplies before you begin crafting your cheer bows⁚
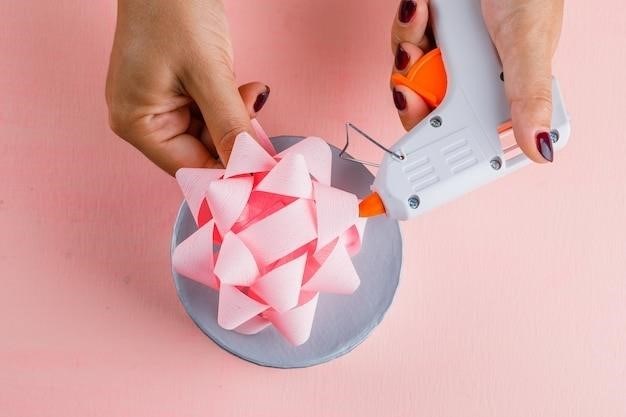
- Ribbon⁚ Choose your team colors or any combination that you like. You’ll need two different widths⁚ a wider ribbon for the main bow and a narrower ribbon for the center. For example, you might use 1.5-inch grosgrain ribbon for the bow and 3/8-inch glitter velvet ribbon for the center.
- Hair Elastic⁚ A standard ponytail holder will work perfectly.
- Scissors⁚ For precise cutting of the ribbon.
- Hot Glue Gun and Glue Sticks⁚ For securely attaching the ribbon pieces and the hair elastic.
- Optional⁚
- Embellishments⁚ Consider adding glitter, rhinestones, or other decorative elements to personalize your cheer bows.
- Needle and Thread⁚ For a more secure and elegant way to attach the center ribbon and elastic.
With these simple materials, you’ll be well on your way to creating beautiful and spirited cheer bows!
Step 1⁚ Preparing the Ribbon
Begin by cutting your wider ribbon to the desired length. A good starting point is 25 inches, but you can adjust this based on the size of the bow you want to make. It’s helpful to use a measuring tape for accuracy. Now, fold the ribbon in half lengthwise and crease the center. This crease will serve as a guide for creating the loops of your bow.
Next, take the narrower ribbon (intended for the center) and cut a 4-inch piece. This piece will be glued to the center of your bow. If you’re using glitter ribbon, make sure to heat seal the ends with a lighter or a heat gun to prevent fraying. This step helps keep your bow looking polished and prevents the glitter from shedding.
With your ribbon prepped and ready, you’re now ready to move on to the next step, where you’ll begin crafting the actual bow shape.
Step 2⁚ Creating the Bow
To create the classic cheer bow shape, start by folding the wider ribbon in half, aligning the raw edges. This will create a loop. Then, fold the ribbon in half again, bringing the raw edges together once more. You’ll now have two loops stacked on top of each other. Make sure the loops are even and smooth.
Now, pinch the center of the ribbon where the loops meet. This will create a “pinch” point that you’ll use to secure the bow later. Once you’ve created your pinch, gently separate the two loops, creating a symmetrical bow shape. You may need to adjust the loops slightly to achieve a perfectly balanced look.
The next step involves securing the center of the bow, which is crucial for maintaining its shape and structure.
Step 3⁚ Securing the Center
To ensure your cheer bow stays put and maintains its perfect shape, there are a few methods you can use to secure the center. One popular option is using a needle and thread. Simply thread a needle with a strong thread, and then poke it through the center of the bow where you created the pinch.
Wrap the thread around the center of the bow several times, making sure to catch the elastic as well. This will create a tight and secure hold. Once you’ve wrapped the thread a few times, tie a secure knot in the back of the bow. You can also add a dab of glue to the thread for extra security.
Another method for securing the center is using a hot glue gun. Simply apply a generous amount of hot glue to the back of the bow where the pinch is located. Quickly press the hair elastic onto the glue, ensuring it’s centered and secure. Allow the glue to cool completely before moving on to the next step.
Step 4⁚ Adding the Hair Elastic
Now it’s time to attach the hair elastic to your cheer bow. This step is crucial for making sure your bow stays securely in your hair. There are a couple of popular methods you can choose from.
One method is to use a needle and thread. Simply thread a needle with a strong thread, and then poke it through the elastic and the center of the bow. Wrap the thread around the bow and elastic several times, creating a tight and secure hold. Tie a knot in the back of the bow to secure the thread.
Another method for attaching the elastic is to use hot glue. Apply a generous amount of hot glue to the back of the bow where the pinch is located. Quickly press the hair elastic onto the glue, ensuring it’s centered and secure. Allow the glue to cool completely before moving on to the next step.
Both methods are effective, so choose the one that you feel most comfortable with. Once the elastic is securely attached, you’re almost done with your cheer bow!
Step 5⁚ Finishing Touches
With the hair elastic securely attached, your cheer bow is nearly complete! Now it’s time to add those final touches that will make it truly special.
One popular finishing touch is to add a decorative center piece. You can use a small piece of glitter ribbon, a sparkly button, or even a small charm. Simply glue your chosen decoration to the center of the bow, ensuring it’s securely attached.
Another option is to add a bit of embellishment to the tails of the bow. You can trim the ends of the ribbon at an angle, or use a pair of scissors to create a decorative fringe. If you’re feeling creative, you can even add a small piece of fabric or ribbon to the ends of the tails for a unique look.
Finally, don’t forget to trim any excess ribbon or thread from the back of the bow. This will help ensure a clean and polished look. And there you have it! Your DIY cheer bow is ready to rock!
Cheer Bow Variations
Once you’ve mastered the basic cheer bow technique, you can experiment with different variations to create unique and eye-catching designs. The possibilities are endless!
For a more whimsical look, try incorporating multiple colors and patterns into your bow. You can use different shades of the same color to create a gradient effect, or combine contrasting colors for a bold statement. You can also use ribbons with different textures, such as glitter, velvet, or even lace, to add interest and dimension.
Another fun variation is to add embellishments to your cheer bow. You can use fabric flowers, rhinestones, or even small charms to create a personalized touch. If you’re feeling adventurous, you can even try adding a small piece of vinyl with your favorite team’s mascot or logo.
For a truly unique look, consider creating a “double bow” by layering two bows on top of each other. You can use the same color ribbon for both bows, or choose different colors to create a contrasting effect. The possibilities are endless!
Tips for Making Perfect Cheer Bows
Crafting perfect cheer bows takes a little practice, but with these tips, you can create professional-looking bows that will make you the envy of your cheer squad.
Start with high-quality ribbon. Grosgrain ribbon is a popular choice for cheer bows because it’s durable and holds its shape well. Choose a ribbon that is at least 7/8 inch wide for a full, voluminous bow.
Heat seal the ends of your ribbon before you begin. This prevents the ribbon from fraying and keeps your bow looking crisp and clean.
Use a template to ensure your loops are even. You can find free cheer bow templates online, or you can create your own using a piece of cardboard.
Secure the center of your bow tightly. Use a strong thread and tie several knots to ensure that your bow stays in place. You can also use a dab of hot glue to reinforce the center.
Experiment with different techniques for attaching the hair elastic. Some people prefer to glue the elastic directly to the back of the bow, while others prefer to thread it through the center. Try different methods to find the one that works best for you.
Where to Find Cheer Bow Supplies
You can find all the supplies you need to make cheer bows at a variety of stores both online and in person. Here are a few places to start your search⁚
Craft stores⁚ Stores like Michaels, Joann Fabrics, and Hobby Lobby are great places to find ribbon, hair elastics, glue guns, and other crafting supplies. They often have a wide selection of colors and patterns to choose from.
Online retailers⁚ Amazon, Etsy, and eBay offer a vast array of cheer bow supplies, including pre-made bows, templates, and ribbon. You can often find great deals online, especially if you’re looking for specific colors or patterns.
Specialty hair bow stores⁚ There are a number of online stores that specialize in hair bow supplies. These stores often carry a wider selection of ribbon and embellishments than general craft stores.
Local sewing shops⁚ If you’re looking for high-quality ribbon or other fabric supplies, your local sewing shop is a great resource. They can often help you find the perfect ribbon for your cheer bow project.
Once you’ve gathered your supplies, you’re ready to start making your own cheer bows!
Storing Your Cheer Bows
Once you’ve made your cheer bows, you’ll want to store them properly to keep them looking their best. Here are a few tips for storing your cheer bows⁚
Use a clear storage container⁚ This will allow you to easily see all of your bows and find the one you’re looking for. You can use a plastic container, a glass jar, or even a shoebox.
Store them flat⁚ This will help prevent the bows from getting crushed or bent out of shape. You can use a piece of cardboard or foam board to create a flat surface in your storage container.
Separate your bows⁚ If you have a lot of bows, you can separate them by color, size, or occasion. This will make it easier to find the perfect bow for any outfit. You can use dividers, tissue paper, or even old magazines to create sections in your storage container.
Keep them in a cool, dry place⁚ Avoid storing your bows in areas that are exposed to direct sunlight or heat. This can cause the ribbon to fade or become brittle.
With a little care, your cheer bows will stay looking beautiful for years to come.
Making your own cheer bows is a fun and rewarding craft that allows you to personalize your cheerleading spirit. With a little practice, you’ll be able to create beautiful and unique bows that will make you stand out from the crowd.
Remember, the most important thing is to have fun and be creative. Don’t be afraid to experiment with different colors, patterns, and embellishments to create bows that reflect your personal style.
Whether you’re cheering on your favorite team or just adding a touch of whimsy to your everyday look, homemade cheer bows are a great way to express your individuality and show your school spirit.
So grab your supplies and get started! You’ll be amazed at how easy it is to create your own cheer bow masterpieces.
